Accessible Air Fryer Positioning for Wheelchair Users
By Aiko Tanaka • 10th Jan
When selecting an air fryer for wheelchair users, proper positioning matters as much as the appliance itself. Too many well-intentioned cooks install an oven air fryer only to find it sits unused because reaching controls causes strain, or crumbs accumulate in inaccessible corners. If you're deciding between oven- and basket-style units, see our basket vs oven air fryer guide to pick a form factor that supports accessible placement. The machine's value isn't just about cooking performance. It is about how seamlessly it integrates with your daily movements. As someone who measures reach arcs and clearance zones in kitchen workflows, I've seen how subtle positioning adjustments transform an appliance from a frustration to a reliable tool. Cleanup is throughput. If your air fryer requires contortions to operate or clean, it won't stay in regular rotation.
Assessing Your Workspace for Accessibility
Before placing any appliance, map your kitchen workflow zones. This isn't just about ADA compliance. It is about designing around your specific movements. Start with a simple clearance check:
- Measure 30 inches in front of your counter (the minimum ADA clearance space) and 48 inches to the side
- Time how long it takes to maneuver your chair through this space with a simulated "full basket" load
- Note any obstructions that force you to reach across hot surfaces
Calculating Personal Reach Zones
ADA standards specify maximum forward reach of 48 inches and side reach of 54 inches, but these are minimums, not ideals. Your optimal height depends on your seated position, arm length, and transfer method. Use this protocol:
- Sit in your chair at the counter with knees positioned where they'd rest during cooking
- Extend your dominant arm toward the counter edge
- Note where your fingertips naturally rest when relaxed (this is your functional high reach)
- Repeat with arm extended downward (your functional low reach)
For most users, the sweet spot for air fryer controls falls between 38-44 inches from the floor, lower than standard ADA maximums but aligned with actual seated ergonomics. This range accommodates air fryer height considerations while preventing shoulder strain during frequent use.
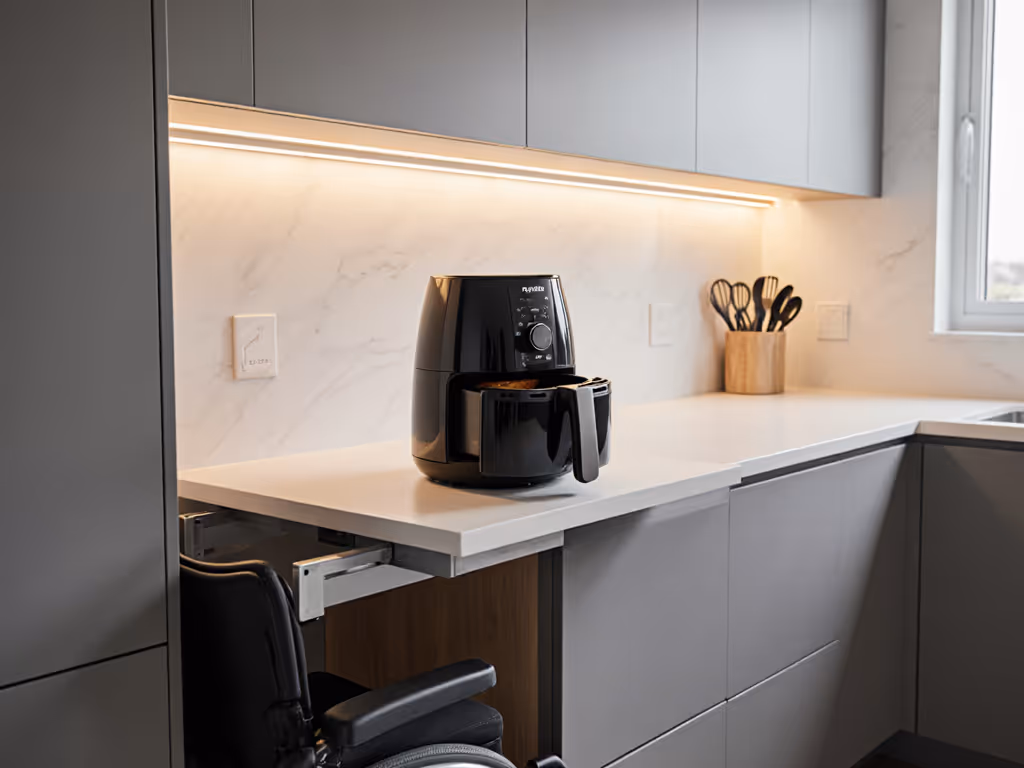
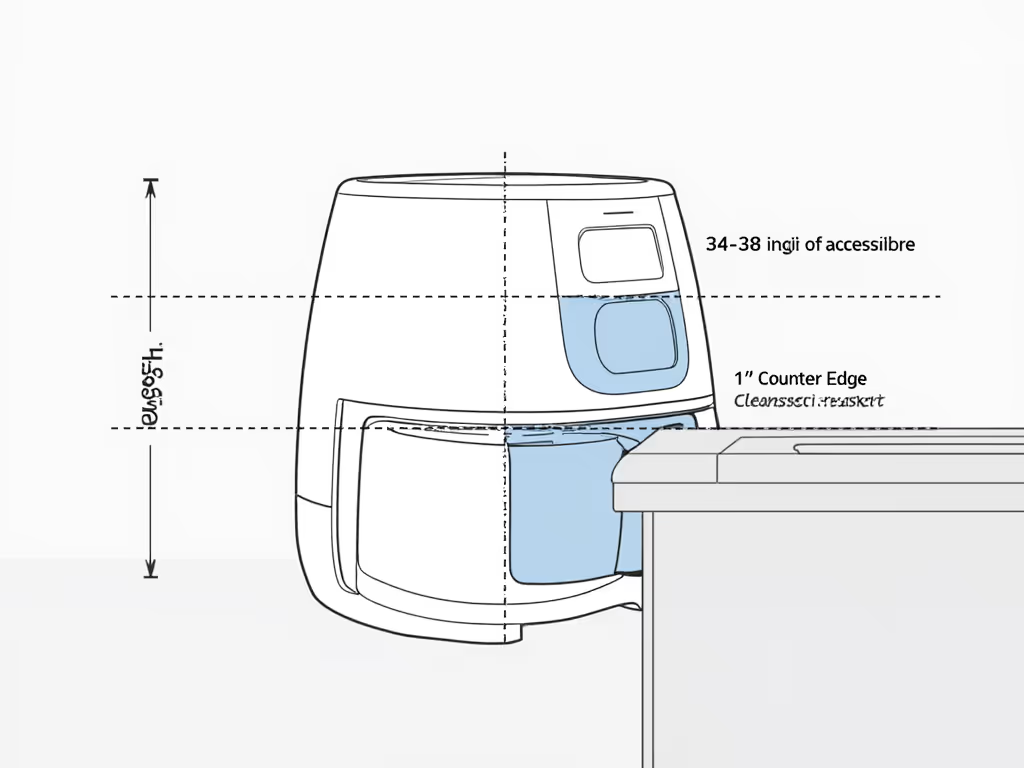
Positioning Your Air Fryer: Height and Clearance
Vertical Placement Strategy
Your air fryer's height affects both operation and safety. The basket handle should sit 2-3 inches below your functional high reach point to allow comfortable gripping without overextension. For most users:
- Position the top surface of the unit between 34-38 inches from the floor
- Ensure the basket handle clears counter edges by at least 1 inch when pulled out
- Maintain 6 inches of clearance above the unit for heat dispersion
This creates a workflow where you can:
- Open the basket without leaning forward
- See cooking progress without craning your neck
- Slide ingredients in without twisting at the waist
Pro tip: Place a level on your counter before measuring. Many kitchen surfaces slope slightly downward toward the back, which changes your effective reach height by 1-2 inches.
Horizontal Clearance Requirements
Beyond height, consider lateral movement space. Air fryers need room to operate safely without forced reaches. Follow this sequence:
- Clear a 30"x48" zone centered on the appliance
- Position the unit at least 4 inches from the wall (prevents heat buildup)
- Ensure basket pull-out doesn't intersect with other appliances or obstructions
This arrangement supports wheelchair accessible cooking by eliminating "overreach zones" where you'd need to lean dangerously forward. Test it by pulling out the basket with a weighted container (like a full mixing bowl). If your chair wheels catch on the cabinet base, shift the unit forward.
Control Accessibility and Operation Workflow
One-Handed Operation Check
ADA requires controls to operate with <= 5 lbs of force and without tight grasping, but air fryers present unique challenges. Verify:
- Buttons depress fully with open-palm presses (not fingertip stabs)
- Touchscreens respond to knuckle taps
- Handles require <= 3 lbs force to release (use a luggage scale for testing)
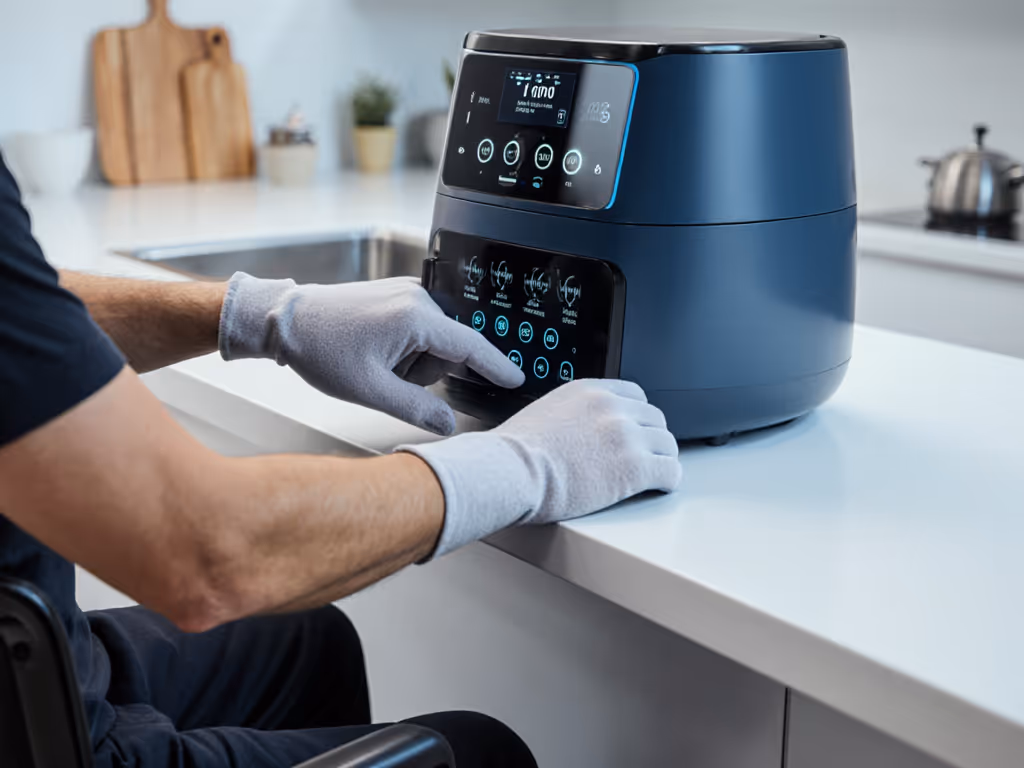
I once timed a client's workflow where awkward button placement added 12 seconds per operation, and over a week, that is 14 extra minutes of straining. To match the interface to your dexterity, compare analog vs digital controls before you buy. Good air fryer safety for mobility limitations means controls function within your natural hand arc without repositioning your chair.
Heat and Safety Considerations
Many overlook thermal safety in accessibility planning. Air fryers expel heat from multiple vents, and positioning affects both comfort and risk. Always:
- Face exhaust vents away from your seated position
- Maintain 12 inches of clearance from cabinets above
- Use a heat-resistant mat beneath the unit (prevents counter damage during transfers)
Integrating Cleanup into Your Workflow
This is where most accessible setups fail. For low-effort methods and tool choices, follow our air fryer cleaning guide to prevent crumb traps and reduce reachy scrubbing. The turning point in my practice came during a Saturday scrub session where I realized that even ADA-compliant placement meant wrestling with crumbs in hard-to-reach crevices. Air fryer safety for mobility limitations extends beyond operation to post-use handling.
Optimizing the Cleanup Sequence
Map your entire cleanup journey:
- Power down → 2. Cool-down wait → 3. Basket removal → 4. Transfer to sink → 5. Washing → 6. Drying → 7. Storage
Time each step. If basket transfer exceeds 8 seconds or requires standing assistance, your position needs adjustment. Ideal placement allows you to:
- Slide the basket directly into the sink basin
- Rinse while seated at the counter
- Access all nooks with standard cleaning tools
For units with removable heating elements, verify you can reach all components without overreaching. If your current setup forces you to stand for cleaning, consider a dedicated lower cabinet conversion. Many adaptive kitchen tools fit perfectly in 15-18 inch base cabinets at wheelchair-accessible heights.
Making It Work For You
Accessibility is not about rigid compliance. It is about designing workflows that respect your energy. The right air fryer placement for wheelchair users makes cooking feel effortless, not exhausting. If you also want safer hardware with cool-touch exteriors and audible alerts, browse our verified elderly-safe air fryer list suited for limited mobility. Start tomorrow with this actionable step: spend 10 minutes timing your current air fryer workflow from power-on to cleaned basket. Note where you hesitate or adjust position. Then shift the unit 2 inches toward you and repeat. That tiny adjustment might be the difference between a machine that gathers dust and one that becomes your weeknight hero.
Remember, the perfect kitchen isn't built to standards, but to your movements. When cleanup flows as smoothly as cooking, you'll actually use the machine. Cleanup is throughput, and throughput is freedom.
Related Articles
Safety & Best Practices
Air Fryer Safety for Kids: Your Essential Guide
Adopt data-backed habits - smart placement, barriers and mitts, thermometer targets, basket capacity limits, and maintenance - to reduce burns and foodborne illness and make kid-safe air fryer cooking automatic. Use the simple checklist to turn safety into a repeatable, low-stress routine.